Tuesday, April 30, 2013

Me-Made-May 13 - I'm In!

me-made-may'13

This year Zoe is hosting another me-made month, and after umming and erring since she announced it, I've decided to sign-up. I took part in Me-Made -May in 2010, and Me-Made-March in 2011, pledging to wear at least one me-made item each day, and found it a nice challenge.

However, although my me-made wardrobe is substantially more now than it was then, I'm not sure that I have enough me-made items to exclusively wear me-made clothes (oh one day... one day), and have had other things that I've needed to work on so haven't been able to address those gaps quite yet (also that seems against the ethos of making clothes, to replace clothes for the sake of it just because they're RTW).

So since Zoe announced this years challenge I've been pondering about whether to join in. I've been thinking that it's a bit of a cop-out to sign up for the same challenge that I managed two years ago.

However, with seeing more and more people signing up I felt left out, so, sheep that I am, I have decided to sign up anyway:

I, Rachel of MyMessings, sign up as a participant of Me-Made-May '13. 
I endeavour to wear as many me-made items as possible every day day for the duration of May 2013. This will be a minimum of one item every day, but hopefully with a few entirely me-made outfits each week (excluding undies, tights, shoes etc).

I haven't committed to only wearing me-made items, but I will do my best to restrict the non-me-made things. Are you joining in? I hear that it's the biggest me-made month to date.

Monday, April 29, 2013

Social Sewing - Dates for the rest of 2013


At the last Social Sewing day I booked in dates for the rest of the year as follows:
  • Saturday 18th May
  • Saturday 22nd June
  • Saturday 20th July (hosted by Sarah)
  • Saturday 17th August
  • Saturday 21st September
  • Saturday 19th October
  • Saturday 16th November
  • Saturday 14th December
So put them in your diaries ladies!!

All the information about social sewing, including all these dates, is also on the Social Sewing Page linked along the top of my blog.

As usual, I will be posting reminders a week or two before the day, so please let me know if you are planning on attending so that I can make sure that we're expecting about the right number of people. Some of the dates we'll be sharing the room with another small group.

Wednesday, April 24, 2013

MadMeh Dress


This dress is my second entry in JuliaBobbin's MadMen Challenge (the first being my Liberty SewCieTea dress).

mmc27

And incase you're wondering, the above title is not a typo, it's how I feel about the dress. I'm really not a fan of the word 'meh' but it really does encompass how I was feeling about this dress after taking the photos in this post. I wore the dress to work on Monday and I'm feeling a little happier about it now though. I think it might just be after the amazing success of my last dress this one is just a bit of a let-down in comparison.


The pattern is this vintage Butterick 3543, that I picked up for the princely sum of 50c in an op shop a while back. As I mentioned in my last post about this dress, I didn't make too many changes to the pattern; just the removal of a foot of length, and some minor changes to the length of the bust darts (which in hindsight didn't really work out).


The fabric is a lovely soft and drapey wool suiting that I got at The Fabric Store in Feb (and as of yesterday they still have in the Melbourne store), which I fully lined so that I don't risk the wool being scratchy against my skin.


I went with view A (the white dress on the pattern envelope), adding the collar to the dress, which I think is pretty cute. I then added some petersham ribbon and some buttons from buttonmania


Either myself or the previous owner of this pattern lost the pocket pattern piece, so I was intending on drafting up a new one, however as I was working on this dress at Social Sewing and Helen (I think) had a copy of the Laurel pattern, so I did a sneaky and traced that off to use as a basis of my pocket (and by I traced it off, I mean Claire traced it off for me because she's nice like that).


After lots of trial and error with the placement of the pocket I settled on a position, changed the bottom corners of the pocket to be square to fit better with my dress, and added some more of the ribbon trim across the top of the pocket. It's not the biggest of pockets, but it fits my phone, (or in the case of these photographs my keys) which is what I wanted it for.


I'm happy with the fit through the back, because of the loose fit and the shaping from the darts I didn't need to worry about a sway back adjustment.

Also this is the first dress that I've made with sleeves, which is a mini-accomplishment. After wearing it all day I can say that the sleeves don't restrict my movement at all, which is good, however I need to be careful about raising my arms too high, as the whole dress comes with them and it all gets a bit indecent!


I've included the below photo so you could see the lining. Interestingly the lining is a very brown-y grey, because that's the colour that matched the best. It was surprising as until we held the fabric up against the lining fabrics I wouldn't have thought there was much brown in the grey.


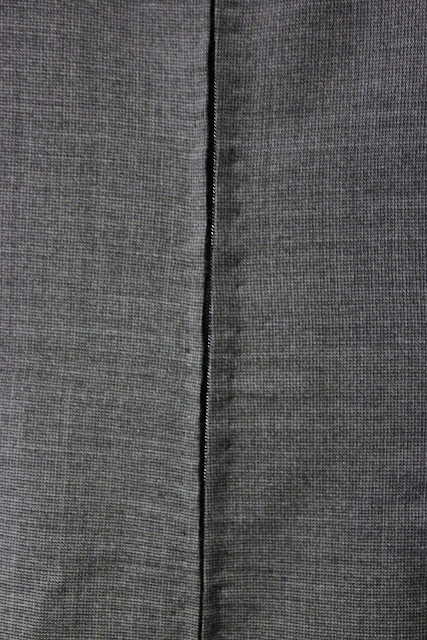
For the zip, as is my go-to method these days, I used a regular dress zip and hand picked it into the centre back seam. I really do like hand piking zips; it doesn't take very long and you have so much more control. I think overall it takes the same as most machine stitched zips as I usually end up unpicking at least a little bit of the topstitching.


Isn't a hand picked zip just beautiful??!


And the Mad Men part... well this dress isn't a direct copy of any of the dresses in the show, but is a general 'inspired by' dress; I could imagine somebody wearing this dress in one of the later seasons of the show. Do you agree? If so, which character do you think might wear it?

Sunday, April 21, 2013

Crinoline!


As I discussed in the post about my SewCieTea dress, I wore a crinoline underneath it. Rather than buy a crinoline, I spent a couple of days making one over the Easter weekend.

I made plans to make it at two consecutive Social Sewing Days. Well, you know why it didn't happen in Feb, and it didn't happen in March because a discussion led to a whole heap of people telling me that I "couldn't make it with that soft tulle, it won't have enough body" and telling me to buy the icky stiff scratchy tulle.


Well after going into a bit of a huff (there may have been a tiny foot stamp), I did some research on the internet. And after reading heaps of tutorials and closely examining lots of pictures of crinolines I decided that I was willing to give it a go with the soft tulle. In particular I fell in love with the look of the above crinolines that I found on etsy, which looked like they only had stiff tulle as one of the layer at the bottom of the crinoline, and the rest was a much softer tulle (or some other kind of fabric).

Emboldened by this I bought 1.5m of the soft tulle from GJs in a cream colour and got planning (the tulle was ~2.7m wide, so 1.5m was a LOT of tulle). Rather than make the whole thing from tulle I decided to do the top section in batiste (the same as I underlined the dress with), and then add two tiers of tulle to the bottom. As I wanted my crinoline to be about 20" long (as the skirts on my dresses are 21-22.5" long) I divided that up as 10" for the top section, and 5" for the two bottom teirs.

I settled on these proportions because I wanted the fullness from the tulle to start around about the fullest part of my hips, which was just over 10" from my waist, to give the nice smooth triangular silhouette but without adding extra bulk unnecessarily.


The top part of the crinoline is actually based on the basic skirt block that I made in my pattern-making classes. I did this rather than just use a rectangle because of how skirts often sit higher at the back than the front on me. In my basic skirt block we had added some extra fabric horizontally over the bum so that the 'hip balance line' was parallel to the floor (and therefore also the hem). Having this hip balance line meant that I could just chop the block off at that hip balance line and know that if I added equal width strips to the bottom of it they would still stay parallel to the floor. Does that make sense?

As the skirt block was straight down and slightly fitted, I added some extra ease at the centre front and centre back and gathered it onto an elasticated waistband

Next I prepared the 'rings' of tulle that would be gathered on into tiers. I measured the bottom of the top panel, and discovered that it was about 1/2 the width of the tulle. The first tier of tulle was 1.5 widths worth, and the bottom tier 4 widths worth. So the ratio I ended up with was 1:3:8.

I joined the strips with french seams, and then gathered the tulle using the fantastic dental floss method. Here is a pic of me using the same method on my Summertime Cambie:


To gather using dental floss, you just need to stitch a zig-zag stitch over the dental floss, and then pull on the dental floss to create the gathers. I stitched my zig-zag at about 4mm wide

To assemble the crinoline I started by gathering the bottom tier of tulle onto the upper tier. I stitched the two layers together by laying the gathered upper edge of the lower tier on top of the bottom edge of the upper tier, overlapping them by about 1.5cm, matching up at key spots, pulled the floss to make them the same length, and stitched over the line of dental floss (which got left in the crinoline, minty fresh petticoat!)


Then I gathered the top of the upper teir, and this one I stitched like a normal seam, aligning the raw edges, stitching and then opening it out. Again I left the dental floss in the seam.


I then created a second set of two tiers of tulle, stitched them together and stitched them onto the crinoline on top of the first layer. I didn't want to gather the two layers together as I thought that might create more bulk than gathering them separately. I stitched them on separately as it was easier than stressing about keeping all three layers from moving, I only had to worry about two at any time.


I added elastic to the casing at the top, but I also added some buttonholes, so if I want to replace/supplement the elastic with a drawstring in the future I can, however I placed the buttonholes at the back of the crinoline, as I figured I'd prefer to have a drawstring tied at the back rather than the front.


*Gasp!* me in my underthings! The up side of using batiste for the top of the crinoline is that it isn't transparent like the tulle, so I can show you what the crinoline looks like without you seeing through it! As you can see, the above picture shows you what the crinoline looks like without the skirt/dress over the top.


Hopefully this information has been of use to you if you're considering making a crinoline of your own. I'm glad I made mine, as it didn't cost much in materials, and didn't take as long as I was expecting (Even though at the time those lines of stitching for the gathering felt like they were taking FOR EVAR).

Tuesday, April 16, 2013

SewCieTea Dress - Some Construction Details/Mini-Tutorial

Thank you all for the overwhelmingly positive response to my SewCieTea dress the other day, I am truly touched. As promised, today I'm going to share some information on the construction of the dress.

Creating the pattern pieces
To add the contrasting band around the neckline I took my bodice pattern pieces (on the left below), and measured out from the neckline a consistent amount (in my case 1.5" plus 5/8" for the seam allowance already included) and marked that line on (shown in red in the middle below). Then I added the seam allowance onto that line and traced it off to make the new pattern piece (below right). Now repeat with the other bodice piece so you have one for the front and one for the back.


As you'll see in the construction steps below, the bodice pieces remained the same, as the contrast band was sewn on top like a facing, so leave them alone.


Cutting Layout
I played around a fair bit to try and get the most economical cutting layout for the dress, as obviously I  I didn't want to waste any of my Liberty fabric. Below is the cutting layout that I'd worked out as a plan...


As the skirt piece was only a quarter of the circle, with it cut on fold on the centre front and back (indicated by a dashed line). So, I folded the fabric along where the first of the dashed lines is and cut out that skirt piece first, carefully making the fold so that it was at just the right point so that I could fit the skirt piece on without any extra. After cutting out the first skirt piece I repeated the process with the second piece, carefully placing the fold to fit the skirt piece, and no extra.

After that I then planned to cut the front and back bodice pieces from each end as shown in the diagram above, however I managed to fit both pieces out of the first 'scrap', shown on the left in the above sketch.


Underlining
My initial plan was to line the bodice with some batiste, but the addition of the contrast band on the neck meant that I couldn't work out how to line the bodice and have the contrast band. This is because the bodice doesn't have a centre back seam, and I didn't want to be sewing the shoulder seams at the end. So, instead I used the method I will detail below, and underlined the bodice.


To underline the bodice, I cut out the two bodice pieces from the liberty, then smoothing it out carefully on top of the batiste I basted the two layers together by hand within the seam allowance and up the middle of the darts. Lastly I cut out the underlining to match the liberty.

Quick Tip: Coat your thread with beeswax when you're hand stitching, it'll make it smoother and less likely to tangle/knot. To coat the thread run it across the wax then 'melt' it into the thread with your iron, using baking paper to protect your iron and ironing board from the wax.


Construction - Contrast Facing
The first step of the construction was the same as all the dresses I've made; sew the darts. After sewing the darts I sewed the bodice and facings together at the shoulder seams. For the facing I just stitched it together with the 5/8" seam allowance and pressed it open (after fusing interfacing to the facing). For the bodice I stitched french seams to make it neater inside.

See how to stitch French Seams in this post


Then I prepared the outer edges of the contrast facing. To do this I wanted to fold in the seam allowances under in a nice smooth curve. To achieve this I used the same method as I would for hemming a curved skirt edge with a line of basting stitches near the edge, pulled up slightly to ease the larger edge into the smaller space

See how to ease in the edge like this in this post.


Next I gave the facing a press to make the fold a nice crease as a smooth curve.


Now to attach the facing to the bodice...

Pin together the bodice and facing at the neckline, lining up the shoulder seams, with the facing on the inside, with the RIGHT SIDE of the facing against the WRONG SIDE of the bodice as in the below photo.


Stitch all the way around the neckline at the 5/8" seam allowance...


Trim the seam allowance and clip the curve...


To have a nice neat fold at the neckline, next I understitched around the neckline (just like I showed how to understitch the pocket in this post) using my topstitching foot, with the guide down the seam, and the needle moved slightly to the side (to the left in the below picture):


Understitching the neckline like this means that when the facing is folded to the outside it will curve around nicely and the insides won't peek out:


The last step for the facing is to topstitch around the outer edge of the facing, again I use the topstitching foot for this, lining up the guide with the edge of the facing and moving the needle across about 1/8" over the facing.


The inside of the neckline will then look like this:


I deliberately kept the bobbin thread navy for the line of topstitching around the outer edge of the facing, even though it means that I now have a line of navy stitching on the inside of the bodice, as I didn't want to risk any white bobbin thread peeking through on the outside if my machine's tension wasn't perfect.


You may have noticed that using this method meant that the armholes aren't finished yet, so to finish the armholes (after stitching the right side seam, and the top inch or so of the right side seam) I finished the armholes with bias binding, but instead of stitching the inner edge down by machine I stitched it by hand only to the underlining so that it's invisible from the outside.

See how to stitch on bias binding in this post, just ignore the stuff about the collar.


The last construction tip that I have is for sewing the circle skirt to the waistband. Because of the curve it can be a bit tricky to do this. What I did was add a line of stay stitching just inside the seam allowance and then clipping at intervals up to the stay stitching (shown above), as then you can pull the skirt pieces to the length of the stitching line much easier.

The hand picked lapped zip
A few of you asked about the hand picked zip, and rather than re-inventing the wheel, here are some resources that I've found particularly useful for learning how to do a hand picked zip:

- This tutorial from Tasia was the first I followed to do a hand picked zip, but a centred one.
- This tutorial from Gertie talks about putting in a lapped side zip.
- The threads article that Gertie references that talks about how to do the hand picking.


As in Gertie's tutorial, I added a placket to the skirt front piece to enclose the raw edge and make the single layer there a little more sturdy (I didn't find I needed to for the bodice). I stitched the back side of the zip, which is under the 'lap', by machine, slightly differently from Gertie as the liberty holds a crease well, I stitched it on and just pressed it back, rather than topstitching by machine like Gertie does.


I hope you've found this further information about the construction of my SewCieTea dress useful; if you have any questions please ask them in the comments below, and if you use any of the tips share with me what you create!

Monday, April 15, 2013

SewCieTea Dress - The Real Thing, In Liberty


You've seen the first practice dress, and the second practice dress, and finally I am showing you the real thing, made of the precious Liberty fabric given to me by my Gran.


To quickly recap the details of this dress, I wanted to make a 50s style full skirted dress, with a fitted bodice and a wide scooped neckline. Rather than spend ages hunting for the perfect pattern and then even longer adjusting it to fit, I chose to use my self-drafted bodice (used here and here) and change the neckline and armholes to suit my vision.


To make the neckline I adopted a really scientific approach; I put on my peacock dress and measured down about how much lower I wanted the front neckline, how much higher the back neckline needed to be, and where I wanted it to fall on my shoulders (mostly dictated by where my bra straps sit) and drew it on to a copy of the pattern, using my french curve to help smooth the curves. I then also extended out the shoulder seams slightly to give the impression of slight cap sleeves.


I fluked out with the neckline, and really liked how it turned out on the first practice dress. After some input from friends confirming some ideas that I'd had, I decided to try adding a contrast band around the neckline and at the waistline. The band at the neck is 1.5" wide, and the waistband is 1.25" (based on the waistband of the Cambie.


I also added a pocket into the RH side seam in the second version, using the pocket piece for the full-skirted Cambie. In all versions the skirt is just a circle skirt (I used the pattern piece from vogue 2902 rather than draft one).


I didn't make any changes after the second practice version, and took my time on the construction of this dress. The inside is almost as beautiful as the outside.


The bodice is underlined with some cream cotton batiste.


I finished the armholes with bias binding (hand stitched to the underlining so it's invisible from the outside) and did french seams on the shoulder seams..


For most of the seam allowances I turned them under and stitched them to give a lovely clean finish.


The waistband was finished with a second waistband piece on the inside, that was machine stitched onto the waist seam allowances at the top, and slip stitched along the bottom.


You can just see it above, the only seam that didn't have all of the raw edges enclosed was the pocket, where I just zig-zagged.


The side zip is a hand picked lapped zip...


I even changed thread colour for the 1.25" of the waistband!


I really do love how a hand-picked zip looks.


The contrast band on the neckline was sewn on like a facing, but on the outside. I will be sharing a post later this week (hopefully) with details of how I constructed the bodice with this contrast detail.


I am incredibly proud of the top-stitching; I love my top-stitching foot!


The skirt wasn't lined, as I wore it with my new Crinoline! (post to follow)


I'm still not completely sure about the crinoline. I've never worn one before (except for a few photos), and I was incredibly aware that I was wearing it all afternoon.


At the time it felt a tad conspicuous and costume-y, but looking at the photos I really love the silhouette of the dress with the crinoline underneath it.


So the jury is still out as to whether it will be worn with or without the crinoline for the wedding I'm planning on wearing it to in the UK in July.


However, I am madly in love with the dress, I really do think (and hope) I've done The Liberty and my Gran proud.

Related Posts Plugin for WordPress, Blogger...