Wednesday, December 3, 2014

Eva Dress... or the day I accidentally made a maxi dress.

Back in May Oanh posted on her instagram about an Eva dress that she had made, but didn't really like because it was too short for her. She very generously let me try on the dress and even more generously gifted it to me when I (surprisingly) fit into it (Thanks Oanh!). Ever since then I have called it the dress that Oanh made me. It's also a little short on me too, but that's nothing a pair of opaque tights doesn't fix, and so this dress got a fair bit of wear over the winter. It also works well with a long sleeved black shirt under it too.


Due to enjoying the dress so much I decided to make another version, adding a little bit of length, using some (I think Viscose) jersey that I got in the swap in London last year.

So, after trying on Oanh's dress I decided to add 1" of length to the bodice and about 2-3" of length to the skirt, which in theory would add the right amount of length for the dress to hit at knee length.

However, I forgot one vital thing with respect to knits; different knits do not behave the same as each other! In particular, the knit I was using is a 4-way stretch, whereas the knit that Oanh had used was a 2-way stretch...


I stitched up the dress, carefully following the (confusing at times) instructions and then tried it on and was incredibly disappointed to discover that the dress was practically at my ankles! Not good!

The dress was relegated to the naughty corner for a while until I felt I had the motivation to take it apart and fix it (as I still wanted this dress). Before taking it apart I tried it on again and worked out that I wanted to remove 2-2.5" of length from the bodice, so that's where I started. The dress was fairly large all over so I just cut off the overlocked seam allowances, not worrying that the dress would therefore be about 1cm smaller on all seams.


While reconstructing it I also took the opportunity to fix up my botched job of the back neckline. Rather than the confusing binding method that the pattern suggested I used clear elastic in much the same method that is recommended for the Maria Denmark day2night top.

I stitched the dress back together and tried it on again... it was better but still needed a heap removed from the length of the skirt, where I hacked off 4-5" of length. Now I was starting to get somewhere!


One last alteration that I made was to take in the fullness in the back bodice; I did this by adding a seam up the centre back that took out the fullness where the pleat was in the bodice back, but keeping the pleat in the skirt. Thankfully with the solid fabric the seam isn't too obvious.


I'm not completely sold on the pleat in the back. I think there are too many components going on in this dress with the cowl, the drape and also the back pleat. I think it would be nicer with just a standard a-line skirt in the back.


I do particularly like the draping on the front, it add something different from anything else I've seen around. Although my alterations have further emphasised the strange extra pull-lines coming from the edges of the neckline, is that something I should worry about for any future versions?

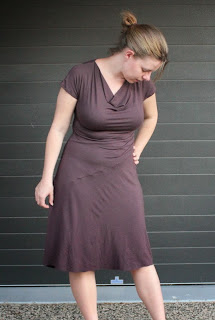
 

In these pictures I'm trying out the no-hemming philosophy with knit dresses... and I have to say I'm not completely sold. I've worn it once like this and the lack of hem feels makes the dress feel unfinished and like it's missing something. I will try it once more, but at the moment I'm erring towards hemming it.


Overall I'm pretty happy with how this dress turned out in the end, and have thoughts of making at least one more in a gorgeous floral viscose knit that Kathleen ridiculously generously donated at social sewing last month and I was lucky enough to grab.

Sunday, November 30, 2014

Striped Blue Plantain


This top is a serious queue jumper; the fabric is one of the pieces I bought in Vancouver. This is a light weight jersey, which I decided to make into a Plantain shirt. I'd been contemplating this pattern for a while, but it's a bit of a departure from what I normally wear so have been a bit hesitant. However, when I saw this fabric in the shop it just screamed Plantain to me so I gave in and finally gave it a go, and I'm very glad I did.


Based on my measurements I cut a size 40 for the shoulders, bust and waist, grading out to a 42 in the hips.


After trying it on I decided that there was a little too much fullness in the hips, so took the top in on the side seams by about the same amount as it would have been if I'd made a straight size 40.


The thing I'm most proud of with this garment is the absolutely perfect job I did on matching the stripes. LIKE. A. BOSS.


I stitched up the top with my overlocker, and finished the neckline with a strip that I carefully cut out of the blue section of the fabric, The line of stitching around the neckline and the hem I just stitched with a normal straight stitch; I didn't bother doing anything fancy and it seemed to have worked out fine as the fabric doesn't need to stretch with this pattern.


There's not much more to say about this one, a nice simple palette cleansing make to help me get my sew-jo back. I'll just leave you with another pic of my amazing stripe matching.

Thursday, November 27, 2014

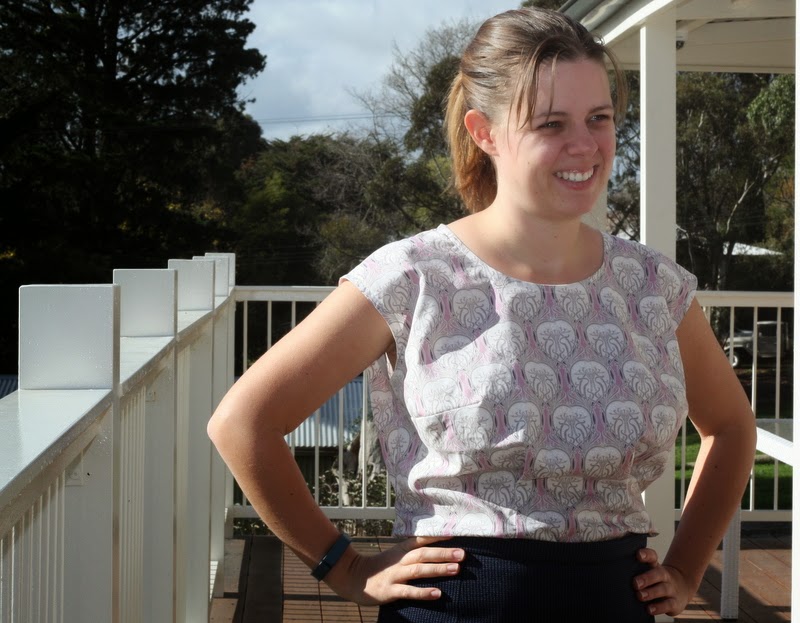
Liberty Portrait Blouse


When I was in London last year I attended an overwhelming meet-up on Goldhawk Road, which included a fabric swap. Unfortunately, I didn't have any fabric to donate to the swap, but the other attendees forgave me given that I was on holiday, and encouraged me to participate in the swap anyway.


I came away with a few pieces of fabric from the swap, one of which was this liberty fabric. I know right, who donates liberty fabric to a swap??? I don't actually know, but whoever that kind soul is, THANK YOU!


This post is horriffically delayed, I actually sewed this blouse, and even photographed it, at Sewaway in June, just hadn't blogged it yet. Nevermind, better late than never, right?


I decided to make another portrait blouse from the fabric. My previous versions get worn a lot, so another one seemed a good idea, and I didn't want to have to worry about breaking up this print with lots of seam lines.


Interestingly, I am assuming due to the difference in drape between this fabric and the fabrics used for the previous versions (this one was less drapey), this version comes across as larger than those previous versions. I think borderline too big. Not that that's stopped me from wearing it, but it's an interesting observation for future note.


As expected for Liberty, the fabric was a dream to sew up. I didn't do anything fancy with the construction, finishing the arm and neck holes with some purchased cream bias binding.


And in true BimbleAndPimble style (pictured above and who I was making faces at in the photo above that), I'll end this post with some silly photos because I don't have anything more to say.

Thursday, November 20, 2014

Grey Pleated Dress


The dress I'm sharing today is Butterick 5559. I've had this pattern in my stash for a while, I think I bought it at one of the Clegs pattern sales. While preparing to make my frocktails dress, after making the muslin and before buying the fabric I had some spare time so cut this dress out. By the time I'd sewn the pleats on one of the pieces I had my frocktails fabric so this got put aside for a little while before I finished it.

The pattern is really clever; there are darts on the bodice front and skirt back, hidden beneath some of the pleats. The pleat almost at my waistline is also actually a seam, so you cut the bodice and skirt out as separate pieces.

I tried the dress on without sleeves, but decided to add sleeves, which I left the just above elbow length in the pattern


I found the pleats quite simple and relaxing to do. I just took my time with marking them and sewing them. I probably should have stitched them with grey thread rather than black though. I managed to match up some of them on the side seams, but some of them just didn't match; I don't know if that was a sewing, cutting or drafting error, but the distance that some of them didn't match by seems bizarre, and a little frustrating.

I used the neck facing that came with the pattern, and top stitched it down around the neckline to stop it flipping. I also took the pattern in a bit along the side seams (including up into the sleeve) as I'd bought the larger set of sizes (because past-Rachel naively trusted the size chart on the envelope). This could possibly have contributed to the issues with matching the pleats, but I don't think explains all of it.


The fabric is a double knit that I picked up from the GJs remnants table. Unfortunately the fabric snags ridiculously easily; the first time I wore the dress I managed to snag the front of the skirt on a bag (visible in the above photos), and have since snagged more and more of it, including along the back just from wearing a backpack with the dress. I had some more of the fabric left but I think it will be relegated to muslins.

So overall, the pattern worked out quite well and I've since bought some more fabric to possibly make another version. I'll probably keep wearing it a bit longer even though it's snagged too, because it's really comfy.

Monday, November 17, 2014

Holiday - Fabric Purchases and Happy Snaps

I've recently been on a 2 week holiday to North America. We had an amazing time, visiting Toronto, Montreal, Seattle and Vancouver. I thought today I'd share a few of the pictures that I took while we were away, but first, the likely reason that you're here... the fabric I bought...


I got this stack of fabric from DressSew in Vancouver. Visiting this store was a perfect example of how fabric stores breaks the space-time-continuum; somehow many hours elapsed between when we entered the store and when we left.

Physics-breaking glitches aside, despite a questionable first impression when I walked into the store due to all the fancy dress costumes the selection of fabrics was impressive. I was particularly taken by the wool suiting selection, which was far cheaper than anything I would get in Melbourne. Unsurprisingly, the majority of what I bought was wool fabric. The original pile was quite a bit bigger than this, but I knew we had limited suitcase space.

I've sketched up some of my ideas for this fabric in my fashionary, shown here...

 
Left: Some slightly textured khaki fabric, which will become either another Ralph, or a Moss skirt.
Right: Some dark green ponte to make another B5559 (first version to be blogged soon).

 
Left: Green wool suiting, which I would like to make a blazer from
Right: Aubergine wool suiting, which I'm contemplating making a biker-style jacket from

  
Left: Some lovely lightweight striped jersey, which I will probably try making a Plantain t-shirt from.
Right: Some Animal print flanelette, which will become some PJ bottoms for the boy.


Left: some cross-hatch suiting, which will probably become a dress, I'm not sure what style exactly.
Right: Some grey wool suiting, which will likely also become a dress of some variety.

In addition to fabric shopping, I also got to meet up with some awesome North American Sewists.

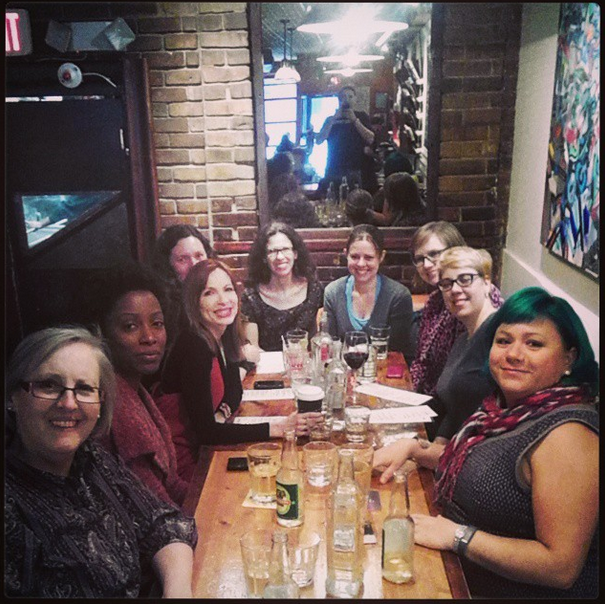
Firstly, the lovely Gillian organised a meet-up in Toronto:

I then met up with the lovely gMarie in Seattle, but have realised that I forgot to get pics :(

And then while I was staying in Vancouver I was super excited to make a trip to SewaholicHQ:
While visiting Tasia I was lucky enough for her to show me some sneak peeks of her upcoming designs, and let me tell you I am SO EXCITED to see them released, there are some fantastic patterns coming up!


Sadly for you, the only sneaky photo I took while there was this one of the view out of Tasia's office window.

And lastly, as promised, here are some general holiday snaps:

Toronto:
 

Niagara Falls:

Montreal:
 

Seattle:
 

Vancouver:
  

Related Posts Plugin for WordPress, Blogger...