Tuesday, January 27, 2015

Strawberry Thief Belladone


Did you know that you can get Vans sneakers made from liberty fabric??! Back in mid-2013 there were 6 liberty prints available as Vans, however I only ever managed to find two of them in Australia, despite having decided that I must have the "Strawberry Thief" style. I also couldn't get them shipped to Australia easily, as supposedly they're imported here by a distributor.


Enormous thanks must go to the ever generous Poppykettle, who very kindly saved me a little bit of her precious luggage space from her trip to the US, to bring back these shoes for me (after I ordered them to be sent to her hotel).


Ever since achieving owning the shoes, I have also been plotting to make a coordinated outfit. Not a whole dress from the fabric, as that might be a bit too matchy-matchy, and also pretty pricey, but something using the liberty as a trim.


Just before Christmas, I bought this coordinating stretch sateen from Spotlight (although unimpressed with spotlight, 3 of the 5 pieces of fabric I bought that day had flaws in them, including this one. very unimpressed).

The liberty has so many colours in it that I had lots of different options for coordinating, but a lot of the possibles that I found didn't seem all that wearable. Bright pink? Too 'girly'. Pale Green? Too bright. Navy? No fun for summer. Then I spotted this steel-y blue. Yup, yup yup!


I chose to use the belladone pattern because it's perfectly suited to using bias binding as a feature. In addition to using bias on the back, and around the neckline and armholes, I also added a strip along each edge of the waistband, and along the opening of the pockets. I kept the bias binding as a thin line, making the visible width about 1/4".


I forgot to stitch down the top few inches of the pleats in the skirt, and may still go back and stitch them down by hand, as it really does make a big difference to the look of the skirt.


I was on a real hand sewing kick while making this dress. The first seam of the bias binding was done by machine, but the second side stitched down by hand. I also hand picked the zip up the back and did a hand stiched blind hem.


This dress has been a little while coming, but I'm thrilled with the end result. I'm expecting it to be great all year round, as I hope it'll be suitable to wear in colder weather with a long sleeved t-shirt and tights underneath.


Also, it turns out that it's pretty tricky to take photos that highlight that the dress and the shoes are coordinated, as the liberty on the dress is so far away from my feet!


Pattern: Belladone by Dear and Doe
Fabric: Stretch Sateen from Spotlight, "Strawberry Thief" Liberty Lawn from L'ucello
Notions: Thread, interfacing (for waistband), matching dress zip


See also: BusyLizzie, Millydodo, Tabatha Tweedie


So, dress coordinating with my shoes; Awesome or a little bit tacky?

Sunday, January 25, 2015

Ziggi - A day's worth of muslins...

So I spent today making muslins for my planned Ziggi jacket. Yes, muslins plural, and I'm not done yet. I kinda think I would have been better off just drafting myself my own jacket, I wouldn't have been much worse off given what you actually get when you buy the Ziggi pattern, it's not like the instructions are anything worth paying for.


First up, let's recap... I have some gorgeous aubergine wool suiting that I want to make into a biker style jacket, and from limited selection of options, I settled on the Style Arc Ziggi pattern.

Now, the style arc patterns are single sized, so you can print only one size at a time.


My bust and waist come in between the 10 and 12, and hips between 12 and 14. For this reason I chose the size 12. Interestingly, my "upper arm girth" places me in the size 8, but my "shoulder breadth" just above a size 14. When you buy the pdf pattern you get three sizes, so I bought the size 10-12-14 bundle of patterns.


Above is the muslin of the size 12, straight out of the envelope.

Starting with the good; I really like how the collar is sitting. And despite the size chart suggesting that the sleeves would be too big I like the width of the sleeves.

And onto the bad issues...

The pooling at the back is somewhat expected based on my body shape, and I didn't worry about that straight away, working on the principle of starting at the top and working down with fitting... the most obvious issue was the armholes. The armholes came very far down, impeding my arm movement an awful lot.


It bunched up as shown above when I moved my arms around at all. My first thought was raising the armscye, but I noted that the bust felt a little more comfortable when the jacket was bunched up around my shoulders like that, so I tried removing some vertical length from between my armpits and shoulders...


Pinning out the excess did seem to help, and achieved the goal of having free use of my arms (a somewhat important thing don't you think?)


I did some partial unpicking and slashed and overlapped all the pieces and stitched them down to check out this alteration a bit more (see above pics), and thought it was promising enough to transfer to my pattern pieces. As this alteration had reduced the overall length of the jacket, I added the length back in at the waist to make the jacket the length I wanted it.

And so my second muslin...


While the principle of my alterations were good, there are obviously still quite a few problems...

Two changes I could easily make to this muslin were that I had added the length too high in the back, and now the seamline of the back peplum piece is sitting too low, so I shortened the upper back pieces and lengthened the peplum to move this seamline up. I also added half an inch of width to the bottom of the peplum while I was redrafting it, to give the jacket a little more ease over my behind....


(Yes, that's my "I've spent a whole day on this muslin and it still looks terrible" face).

So, at the end of a day of muslining I still have a heap of problems, for which I'm thinking the following changes for muslin number three:

- Add a little more length back in where I removed it between the armpits and shoulders to hopefully alleviate some of the pull lines from the armpits
- Take the width of the shoulders in by about 1.5 at the top, tapering to nothing by the lower sleeve piece (note my comment earlier about being worried about making a size too small for my "shoulder breadth" - what a load of tosh that measurement is! It's too big in the shoulders, not too small!)
- Do a sway back adjustment to remove some of the pooling at the small of my back
- Do a small FBA through the middle of my "middle front piece", to add some more ease and shaping through the bust
- Possibly add a little waist shaping through the side seams.

What do you think? Would you make those changes based on the above photos? If not, what changes would you make?

...and if I do eventually manage to get a good fit, I then need to work out how to make equivalent changes to the lining pieces.

Which reminds me of another frustration with this pattern; the pattern notes that the lining is optional, however you have to print all the pieces, there's no option for printing just the shell and/or lining pieces. This is frustrating me right now in particular as I'd quite like to reprint just my outer pieces, but to do so I'll have to reprint the whole thing. The lining and shell pieces are completely mixed together on the pattern sheets, so it's not even like I could just print some of the sheets to print the shell pieces again. I'm very disappointed by this.

Friday, January 23, 2015

Maxi Dress

Last January I made my first maxi-dress by extending my t-shirt pattern into a dress. That dress has had a reasonable amount of wear through the hot weather so I'd been keeping an eye out for some suitable fabric to make another one.


I found this rayon jersey in Spotlight recently and knew I'd found my fabric. The last version I was always tugging up the bodice as the arm holes were too low, so I added about 1.5" to the bottom of the armholes this time around to solve this problem.

I spent quite some time cutting out the pieces, and think I've done quite a good job of matching the stripes down the side seams:


I added some 1" strips of red jersey to finish the neckline and armholes; pressing them in half, stitching down the inside first with a zigzag and then folding it over and zigzagging along the edge of the outside.


I'm still not completely convinced about how flattering this dress is, but it's comfyness redeems most misgivings.


Pattern: Self drafted maxi dress (inspired by Mission Maxi)
Fabric: Rayon Jersey from Spotlight, some scraps of red jersey
Notions: Just thread!

See also: Creative PursuitsLazy Stitching,  Ada Spragg, Notes from a mad housewife

Also, as the selvege of the fabric professed to be a leopard print (I know, it confused me too), I guess this could be a sneaky entry for Jungle January.

Wednesday, January 21, 2015

Sewciedone Dress


This is the last piece of this gorgeous spotted cotton sateen that I bought back in April of 2011. I feel I have done it justice.

The rest of the 11m stack that I bought with this fabric became a Crescent SkirtPortrait Dress and a brightly coloured quilt. Adding in this dress, each of the four are very different. It's interesting to see what varied potential just one type of fabric can have.


This dress is a mash up of the bodice from the sewcietea dress (without the contrast band), and the skirt from the Dear and Doe Belladone. This version of the belladone skirt incorporates the alteration I mentioned intending to do at the end of my post about my Roisin Dress, which I am calling a "Full Bum Adjustment", and I intend to talk about properly another time.


To add some interest to the dress, I decided to add piping. I also think that the miss-match of the spots with the waistband would have looked strange without anything defining the seam. I initially thought of flat piping, but decided to woman up and go for the real thing. This is the first time I've done "proper" piping, and as straight forward as the process was, I wouldn't want to do it on anything where I'm not sure of the fit.


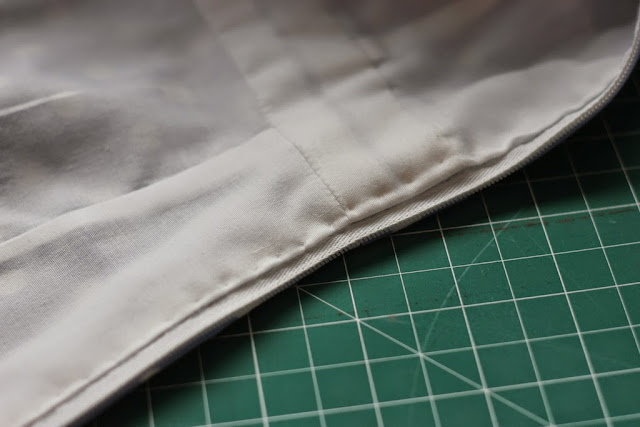
As I wasn't sure about how to handle the piping and an invisible zip, I elected to hand-pick a dress zip into the centre back seam of the dress.


The dress is lined throughout with (I think) some white voile (I get the light weight cotton fabrics a bit confused), and has some interfacing (probably slightly heavier than ideal) in the waistband.


I couldn't be more happy with the construction, fit and overall look of this dress.


Pattern: Self-drafted 'sewcietea' bodice, Belladone by Dear and Doe skirt
Fabric: Cotton Sateen from Spotlight
Notions: Thread, interfacing (for waistband), matching dress zip, white voile for lining and piping fabric, smallest piping cord I could find.

Monday, January 19, 2015

Granville v01 aka the Cinderella shirt

I am really excited about the Granville pattern from Sewaholic that was released last week. I have been excited about this pattern since meeting Tasia in November, as she was wearing her liberty version that day.

So excited that I downloaded the pdf version the day it was available and started making a version straight away.
So excited that I didn't really think through sizing/fitting properly...

Based on my measurements I cut a straight size 10, no alterations. It seemed like a sound decision at the time, that's the size I normally make for sewaholic, and I didn't have to do a FBA on the pendrell blouse, so surely this one would be similar and fit too...?


Yeah, it doesn't fit. It is almost comically too big. It is too wide through the shoulders, the collar is a bit too wide, there is pooling at my lower back and it's too long in the body and the sleeves. It's also a bit funny through the hips (not so clear in these photos as these photos were taken at social sewing and I didn't think to bring anything else for my bottom half than the flared skirt I was already wearing), being too wide at the sides but snug at the back (as much of my circumference at the hips is my bum, rather than having wide hips persay).


It's also a bit long between the shoulders and bust. The armholes are a bit low on me, and if I move my arms around, it all hoiks up over my bust and stays there when I put my arms back down.

So yeah, not such a good look... Thankfully, not all is lost, there are benefits to having lovely local sewing friends, as I didn't have to look very far to find a new home for the shirt. As Oanh termed it, the shirt became a Cinderella shirt, and the lucky one that it fit was Sarah.


Sarah and I have very similar measurements, our bust, waist and hips are pretty much the same, but as you can see, it's not as simple as that! A shirt that looked slightly ridiculous on me looks fabulous on her!


The above picture is even after she has been moving her arms around like crazy and hasn't readjusted the shirt at all.

So, once I have examined the shirt a little more to determine which size/alterations I should make for my next version, this almost finished shirt will go to live with Sarah. It's a very sharing shirt, given that the (gorgeous) fabric came from Kat to start with.


Despite the fit issues, which really are my own fault, I am very happy with this shirt. Working step by step through the instructions I am thrilled with how well the finish turned out. The act of sewing the shirt together let me flex my sewing muscles and learn some new techniques.


So onward and upwards. I am still excited about this pattern, but for my next version I will take my time with determining my size and hopefully the fit will be more suited to me...

Related Posts Plugin for WordPress, Blogger...