Showing posts with label Gertie's book. Show all posts

Thursday, November 27, 2014

Liberty Portrait Blouse


When I was in London last year I attended an overwhelming meet-up on Goldhawk Road, which included a fabric swap. Unfortunately, I didn't have any fabric to donate to the swap, but the other attendees forgave me given that I was on holiday, and encouraged me to participate in the swap anyway.


I came away with a few pieces of fabric from the swap, one of which was this liberty fabric. I know right, who donates liberty fabric to a swap??? I don't actually know, but whoever that kind soul is, THANK YOU!


This post is horriffically delayed, I actually sewed this blouse, and even photographed it, at Sewaway in June, just hadn't blogged it yet. Nevermind, better late than never, right?


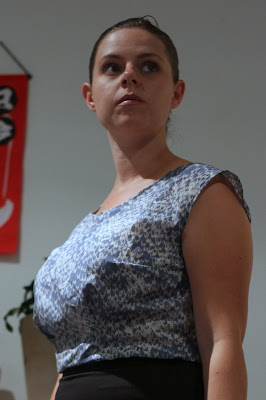
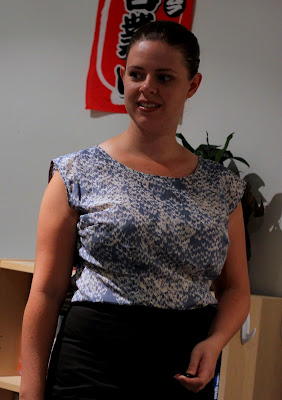
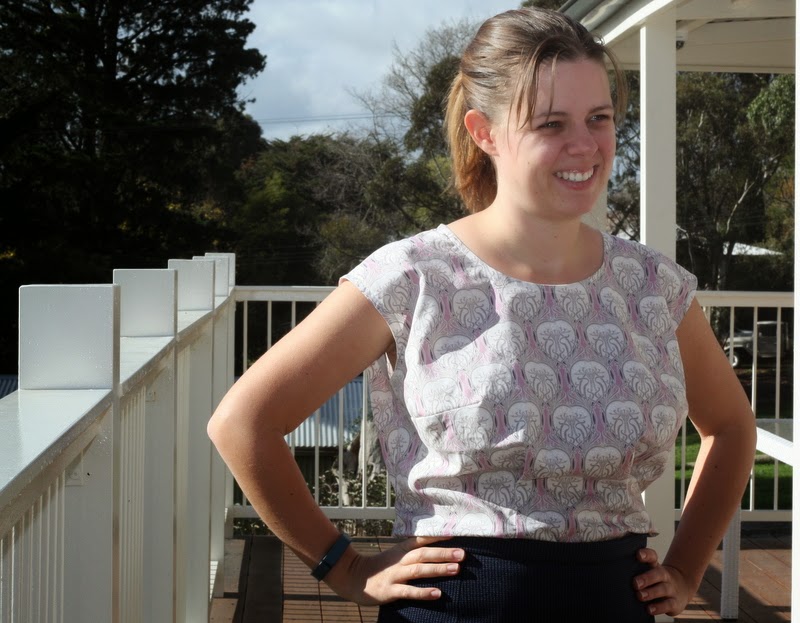
I decided to make another portrait blouse from the fabric. My previous versions get worn a lot, so another one seemed a good idea, and I didn't want to have to worry about breaking up this print with lots of seam lines.


Interestingly, I am assuming due to the difference in drape between this fabric and the fabrics used for the previous versions (this one was less drapey), this version comes across as larger than those previous versions. I think borderline too big. Not that that's stopped me from wearing it, but it's an interesting observation for future note.


As expected for Liberty, the fabric was a dream to sew up. I didn't do anything fancy with the construction, finishing the arm and neck holes with some purchased cream bias binding.


And in true BimbleAndPimble style (pictured above and who I was making faces at in the photo above that), I'll end this post with some silly photos because I don't have anything more to say.

Saturday, March 30, 2013

Portrait Dress


You know when you read somebody using the phrase 'whipped up' a garment? Is it just me that frequently thinks "whipped up? come on, clothes aren't generally whipped up! There's more work involved than that!"? Well, as much as I fear using the phrase myself, I really did 'whip up' this dress this week. I mean, two pieces and some bias binding, there's really not that much to it.


When making up my second portrait blouse a few weeks ago, I couldn't help but think about how the blouse would work lengthened into a dress. So this week, when I had some spare time, I had a go at extending the portrait blouse pattern into a dress.

Most of my summer dresses are of the fitted bodice, full skirt variety, which don't get me wrong, I love. However, when it's really hot and you just want something to lounge around in, you don't really want to be wearing a fitted bodice! So, the intent is that this will fill that gap in my summer wardrobe. (I know, I know, summer is over, whatever! It was still hot when I started this... but colder when I finished. It's Melbourne, you never know, the heat could come back!)


To convert the pattern into a dress, I taped some extra fabric to the bottom and extended the side seams out at an angle similar to the edge below the waist already. Also, knowing that I have quite a, shall we say, developed derrière, I pivoted the centre back seam so that it was the same size at the neckline, but about 2" extra at the centre back at the hipline (well 4" as it is on the fold). I measured the blouse and my measurements to make sure that there was plenty of ease through the hips and cut it out!


When sewn up the only real change I made was altering the back tucks - I made them bigger than they were originally  (about 3 times the size) to bring the fabric in across my lower back. This was necessary because of the extra fabric I had added by pivoting the centre back seam out. Now it's finished though, I think the back tucks are stitched a little long, and I'm planning on unpicking the bottom inch of them to let them finish slightly higher up. I hemmed it a couple of inches above the knee, to make it long enough not to flash people when bending over and such, but short enough not to be frumpy.


The fabric that I used is a lightweight sateen from spotlight, one of a whole host of matching spots I bought about 2 years ago. (This actual fabric is actually also in my 'seeing spots' quilt, which is about half quilted and patiently waiting to be finished, but I bought extra, always with the intent to make a dress with it).


While my other two portrait blouses were finished with self bias binding on the inside, I knew as soon as I tried on this dress mid-construction that I needed to find some green fabric that matched the green spots in the print.

I found this green at GJs, it's actually a quilting cotton, which I'm normally very cautious of using in garments, but as it was the PERFECT colour I decided to risk it. I am very surprised at how well it worked out actually! I loosely followed this tutorial, and am really happy with how it's sitting. Also, I used a topstitching foot when doing the topstitching on the binding, and am absolutely thrilled at how well it turned out!


Overall I'm incredibly happy with this dress. If I were to make another one I think I might curve the skirt side seams a bit to make it a tiny bit strighter and less a-line, but other than that so far I'm loving it!

Thursday, March 14, 2013

Silk Cotton Portrait Blouse


This past weekend was a long weekend here in Melbourne, and I spent a very enjoyable weekend doing a combination of playing SimCity and sewing up this blouse. I wanted something nice and easy to work on, and since my first version was so successful, I decided to get on with making another version of Gertie's Portrait Blouse.


This iteration is made with the silk-cotton blend that I bought when Social Sewing went on the road. It really is beautiful fabric to work with, I'll definitely be keeping my eye out for more of the same or similar. It was easy to cut, easy to sew and easy to press. Nothing to complain about at all!


The blouse was made almost identically to the first, except I lowered the armholes by about an inch as I have found the armholes on the first version a tiny bit restrictive. However it turns out this wasn't the right alteration to make, as now you get a nice view of the side of my bra at the bottom of the armhole. Thankfully I kept the bits I cut off, so I'll have to try something different next time. Again. the armholes and neckline were finished with self bias binding, and the hem just a narrow rolled hem.


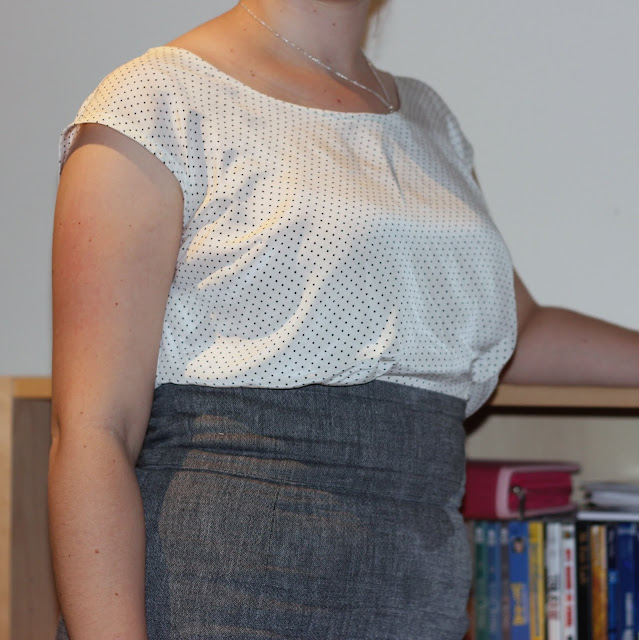
This silk-cotton blend, which is a lot like a voile but with a slight sheen and an incredible soft-ness, has nice drape but doesn't have the weight that the silk crepe de chine had, so doesn't hang quite as well as the first version, but is still more than appropriate for the style of blouse. As you can see in the pictures, it works tucked in or left loose.


Between this and the Pendrell Blouse I'm pretty sorted in the simple blouse pattern department these days, which is nice! I'm finally getting a nice collection of smart separates as an alternative to dresses for work.

Thursday, September 20, 2012

Portrait Blouse

You may have noticed that it's been a bit quieter around here this week than the last few, and that's because I started a new job on Tuesday - hooray! It does mean that I have been very tired and had less time for sewing and blogging.


I have however managed to get a little sewing in each night, and last night I finished a portrait blouse, the first pattern that I've tried from my copy of Gertie's New Book for Better Sewing.


It it also the first garment I've made where I've done a FBA. I traced the pattern in a size 6 (rather than a size 8 as suggested by my full bust) and then did a 1" FBA to add back the ease lost by going down a size (since there is 2" between each size).

I also traced the longest length, as she mentions that it's a short blouse and I figured it would be easier to shorten than lengthen at the muslin stage. I ended up keeping it at that length as I liked it. So if you plan to make the blouse bear that in mind, especially since I'm 5"4 with a relatively short body.


After the FBA I made a muslin, from which I made the following alterations:
  • I added 5/8" onto both the front and back side seams
  • I removed some length from the shoulder seams - about 1/2" at the front and about 1 1/2" from the back
  • I then redrew the armholes so they were approximately the original size
  • I lengthened the back by about 1" at the centre back, tapering to nothing at the side seams
  • I lengthened the bust dart slightly
Having now worn the finished thing, the only changes I'd make to any future versions would be to scoop out the back of the armhole slightly, and maybe make the neckline very slightly higher. But that's just me being super picky really.


The fabric is a Silk Crepe de Chine that I bought waaaay back at the beginning of 2010 from Tessuti. I was intending to make a Sencha blouse from it, but that never happened, so when I was hunting in the stash for fabric that might be suitable for a pattern from Gertie's book it was an obvious choice.


Now, please bear the date of purchase in mind when you compare it to the example blouse in the book - it is a complete coincidence and I did not intentionally copy Gertie's version! Besides, her spots are bigger and if you read the text hers is a silk charmeuse, not crepe de chine (although my fabric knowledge isn't great enough to know if there's any real difference there!)

The silk was super slippery and slidey, so I used my rotary cutter (brand new blade!) and awesome super large cutting mat to cut out the pieces.


With regards to the contruction of the blouse I made three changes from the suggested construction in the book.

The first was omiting the facings and instead finishing the neckline and arm holes with self-bias tape. I used the method Tasia uses for the Pendrell blouse to make and attach the bias binding (cutting strips 2" wide) as I really liked the method when I used it on my Chiffon Pendrell and thought it'd be good for this fabric, as the crepe de chine was fiddly to sew. I initially did this because I find facings annoying, both to sew and to wear, but I have since realised that it was a good call as the fabric is slightly sheer, so the facings would have been super obvious.


The second was not sewing the vertical darts all the way down to the hem (see below). At the front I stopped around about where the hem line would have been for the size 6 (I think), and at the back about 1 1/4" higher than that point. I preferred the way it looked this way, and also meant that I didn't need to add any extra width for my hips!

The last change was omitting the zip in the side seam suggested in the book.


I wore this blouse (tucked into my grey jenny skirt, as in the top photos) all day at work today and it was really comfy! (which also explains it being slightly crumpled). However, after changing into jeans to take some untucked photos I think it would also be great worn like that more casually. A big success I'd say! If this is an indication of what the rest of the patterns in the book will be like then I'm even more excited about it!

Monday, August 27, 2012

Squee!!!

Look what I picked up from the DHL depot in my lunch break today!!!


That's right, Gertie's new book!! After hearing last week that it was shipping early from Amazon I jumped online and ordered myself a copy! I paid for the middle priced shipping option (the $15 one, rather than the $5 one), which brought the total cost up to $10 more than if I bought it from the book depository, but I decided that that $10 was a small price to pay to get the book sooner! (since the book depository still isn't even shipping yet).

I ordered it on Tuesday, and they tried delivering it to me in Melbourne on Friday - how's that for speedy delivery! Sadly I wasn't home, so I had to arrange to pick it up, and had the agonising wait over the weekend. I was practically bouncing around in my chair at work this morning, so I traded my lunchbreak  for an earlier one and on the dot of noon dashed off on my bike to North Melbourne to pick it up.


I haven't managed to do much more than flick through the book yet, but all I had to to was open the cover to fall in love. The dress pictured above is pictured on the first page of the book and it was love at first sight! After some frantic flicking through the book I discovered that this is one of the 10 patterns included in the book (phew!).


Yes, that is Liberty that Gertie has made the dress from. And did you want to know something fortunate? I have a nice big piece of the same liberty in the blue colourway just waiting to be made into something lovely, maybe this pattern will be it...

I'll be back in a few days when I've actually had a chance to read the book with a more thorough opinion, but I already suspect that my "to sew" list is about to explode!
Related Posts Plugin for WordPress, Blogger...