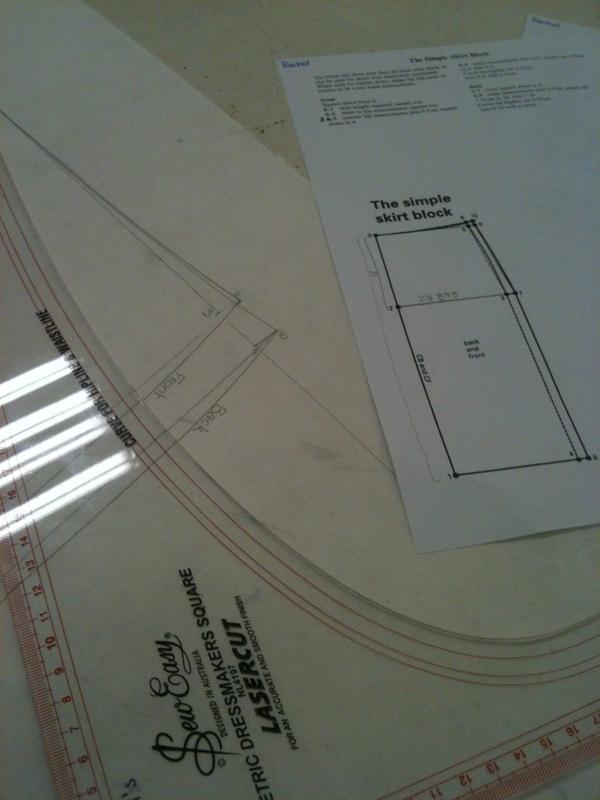
Waaaaaay back in October I told you about the Patternmaking classes that I was taking. The first class, that I already told you about, was for drafting an 'easy fit' skirt, which if you're paying attention I used the block for to make my crinoline. Well I have FINALLY gotten around to snapping some (fairly poor quality, sorry!) pics of the garment that I made from the 3rd and 4th class; trousers!
In the class we drafted a pair of 'easy fit' trousers - loose trousers with an elasticated waist. The kind of pattern that I would normally use to make pyjama bottoms. As I drafted this block during the spring, I decided to make myself some 'Linen Lounge Trousers' to wear casually in summer. The theory was that they would be like pyjama trousers, but if I needed to I could wear them outside (unlike my pyjama trousers, which are all in garish prints).
I bought some brown linen from Spotlight, and made up the trousers. Sadly I think I have to call these a fail (hence why I'm only getting around to blogging them now). The wide legged look is not really for me, they just don't feel 'right'. There were also some issues with the fabric that I used; it very quickly started pulling apart at the centre front seam, which eventually became a hole (that I have since tried stitching up). I don't think that this is due to my pattern drafting, but due to the fabric itself, as Claire has used the same fabric in a different colour to make a skirt and says she's getting the same on some of her seams.
However, there are some details that I added to them that I wanted to share, which is why I'm bothering to blog them at all...
For the elasticated waist, I added the elastic to the waistband like I normally would, but then did some lines of topstitching over the waistband and elastic as shown below. This stopped the elastic twisting in the waistband, which is one of my minor gripes about my pyjama bottoms.
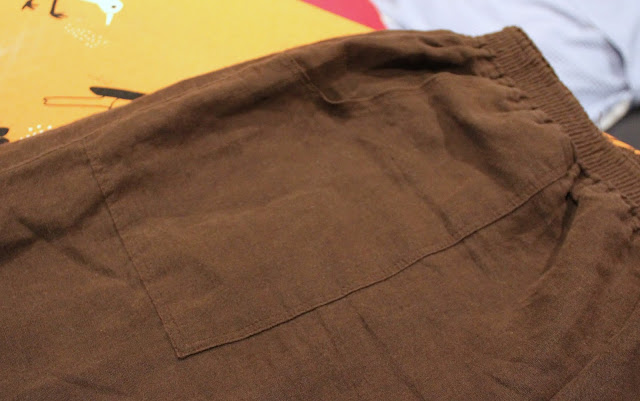
I also added a pocket, which was a hybrid of a slash and patch pocket; the pocket was the same shape as a slash pocket would have been, but I stitched it onto the outside of the front trouser pieces before assembling the trousers. I think the pockets were the most successful part of these trousers.
So there you have it, the outcome from my 3rd and 4th patternmaking classes. Unfortunately I don't think this block will replace the one I already have for pyjama bottoms, but it was an interesting exercise.
In the last two classes of the original course of 6 we drafted a dartless loose bodice, which I have since converted into a kimono style dressing gown pattern. Eventually I will sew it up, but I haven't just yet, so no post on that yet either :)
Showing posts with label patternmaking. Show all posts
Wednesday, June 5, 2013
Sunday, March 17, 2013
Meet Ralph...
Today I have somebody very special to introduce you to; his name is Ralph.
Ralph was conceived in my pattern making classes, as an exercise in making patterns from the fitted skirt block that we made.
This particular version of Ralph is made from some wool left over from making my Thurlow Shorts, and is lined with some black lining fabric I had lying around. Ralph is fastened with a centre back zipper, which is lapped (because I wanted to try something new) and hand picked.
Ralph is a little bigger than he was intended to be (partly due to me not trying him on before putting in the zip) so sits slightly lower than originally planned. But since he really is quite short that's probably a good thing, as if he actually sat where he was designed to sit, things would be a bit indecent.
Thanks to the lovely Sarah for snapping these pictures for me. During the process Sarah commented that I looked a bit like a ballerina, which led to this...
Which of course led to this...
Anyway, that's Ralph, I hope you like him as much as I do.
PS: I took the plunge and purchased a domain name this weekend; if you visit www.mymessings.com you'll arrive right back here at my blog :)
Labels:
patternmaking,
Ralph,
Skirt
Friday, October 19, 2012
Patternmaking Classes - 1&2
I've recently started some patternmaking classes on Monday evenings. They're run at The Dancing Queen in Fitzroy. I've started off with the 6 week "Patternmaking 1" course, which covers the basics of pattern making and we practice the basic principles by making some basic 'unfitted' blocks.
Weeks 1 and 2 have been about drafting a basic "easy fit" skirt block. After spending the beginning of the first session learning about taking accurate measurements, and then taking our measurements in pairs, we set to drafting a very basic straight skirt with an elastic waistband. In the second session we made up toile's of our skirts, and if applicable made alterations.
I was still a little cautious of the course at the beginning as there was quite a lot of discussion of standard sizing, and when we took our measurements we were then asked to pick our closest standard size and make note of our variations from it.
While I'm not interested in making things to standard sizing, but want to make it to my personal sizing, it was an interesting exercise to see how my sizes measure up in relation to the "Australian Standard". Overall I'd probably be a 12, with my bust falling into a size 12, however my hips are a size 16, but my shoulders and arms are off the bottom of the scale (which goes down to a 6) - pear shaped much?!
Thankfully the relevance of the class picked up once we started drafting, as the skirt pattern didn't give any mention to standard sizes' but was purely based off our measurements - our waist, hip and 'waist to hip' measurements to be precise.
After drafting the block we traced it off, added seam allowances and checked the accuracy of our drafting by walking the seam lines - mine was bang on! Hooray! Then it was onto making the toile.
As I would have predicted based on my experiences hemming skirts, my skirt was slightly shorter at the back than it was at the front. While in the past I have just hemmed it so that it sits at an equal height from the floor when wearing it, this isn't really the 'proper' way to do it - especially if you want to use a border print for example. Our teacher Maida told me how to alter the pattern properly - and it's to add extra to the skirt near the bum, rather than at the bottom. You can see my alteration here, my skirt was 1.5cm shorter at the back, so that's how far I spread the pattern, after drawing a diagonal line from the very top of the side seam (as to not interfere with the side seam curve):
You can see my second toile after making the alteration here (sadly I don't have a before pic for comparison):
You'll have to believe me, that now the skirt sits level with the floor at the front and the back.
It's encouraged (but not part of the actual course) to now use our block to make a garment with the pattern to test out our drafting skills properly, but I'm completely at a loss of how to modify this pattern into a design that would be comfortable and flattering and to my style... I'm not usually an elasticated waistband kind of girl!! Any ideas?
Weeks 1 and 2 have been about drafting a basic "easy fit" skirt block. After spending the beginning of the first session learning about taking accurate measurements, and then taking our measurements in pairs, we set to drafting a very basic straight skirt with an elastic waistband. In the second session we made up toile's of our skirts, and if applicable made alterations.
I was still a little cautious of the course at the beginning as there was quite a lot of discussion of standard sizing, and when we took our measurements we were then asked to pick our closest standard size and make note of our variations from it.
While I'm not interested in making things to standard sizing, but want to make it to my personal sizing, it was an interesting exercise to see how my sizes measure up in relation to the "Australian Standard". Overall I'd probably be a 12, with my bust falling into a size 12, however my hips are a size 16, but my shoulders and arms are off the bottom of the scale (which goes down to a 6) - pear shaped much?!
Thankfully the relevance of the class picked up once we started drafting, as the skirt pattern didn't give any mention to standard sizes' but was purely based off our measurements - our waist, hip and 'waist to hip' measurements to be precise.

After drafting the block we traced it off, added seam allowances and checked the accuracy of our drafting by walking the seam lines - mine was bang on! Hooray! Then it was onto making the toile.
As I would have predicted based on my experiences hemming skirts, my skirt was slightly shorter at the back than it was at the front. While in the past I have just hemmed it so that it sits at an equal height from the floor when wearing it, this isn't really the 'proper' way to do it - especially if you want to use a border print for example. Our teacher Maida told me how to alter the pattern properly - and it's to add extra to the skirt near the bum, rather than at the bottom. You can see my alteration here, my skirt was 1.5cm shorter at the back, so that's how far I spread the pattern, after drawing a diagonal line from the very top of the side seam (as to not interfere with the side seam curve):
You can see my second toile after making the alteration here (sadly I don't have a before pic for comparison):
You'll have to believe me, that now the skirt sits level with the floor at the front and the back.
It's encouraged (but not part of the actual course) to now use our block to make a garment with the pattern to test out our drafting skills properly, but I'm completely at a loss of how to modify this pattern into a design that would be comfortable and flattering and to my style... I'm not usually an elasticated waistband kind of girl!! Any ideas?
Labels:
class,
patternmaking
Subscribe to:
Posts (Atom)