Showing posts with label Wallet. Show all posts

Wednesday, May 15, 2013

A Replacement Wallet


You may or may not remember that I made a wallet for myself a bit over a year ago. Unfortunately really quite quickly after finishing that wallet it started to look a little sad:


The iron on vinyl that I had applied to the outer fabric started tearing, where the press-stud was applied started to stretch out and overall the wallet became floppy and sad looking.


So, while I was in the UK last July I picked up some gorgeous Oil Cloth from the shop at Cowslip Workshops.... and it had been sitting in my stash until fairly recently.


I liked the overall design of the wallet, so made another one using the same tutorial as last time. As with the one I made for my gran I added some extra layers of interfacing (I interfaced both the biggest pieces, and the pieces on the back of each pocket, and the flap for the snap with quite a stiff interfacing).


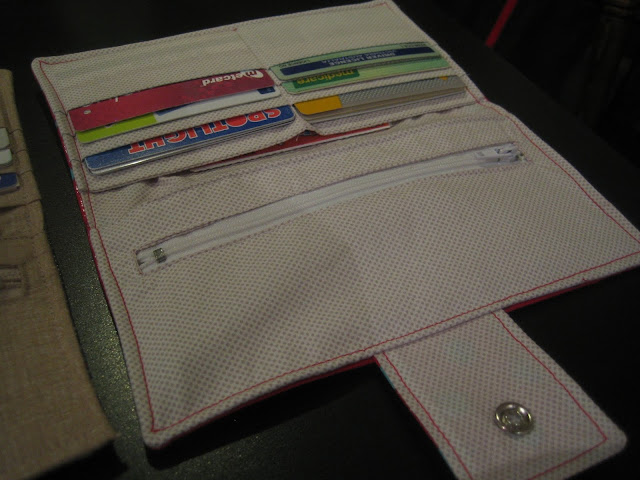
I decided to use two fabrics on the inside of the wallet, adding a pop of pink in the back and a pink zip.


Again I used my top-stitching foot for much of the top-stitching; I really do love that foot, it makes it so easy to get nice even top-stitching.


It all went together smoothly, being the third of these that I've made.


The only difficulties that I had were with the last bit of topstitching around the whole thing, where I had a few tangling issues and had to pull the stitching out and start again. But going slow I got there in the end.


I've already transferred my cards and money into it, hooray for a new wallet!!

Tuesday, March 12, 2013

Wallet for Granny

I am very behind in sharing some of the things that I've been making (I'm blaming the Hollyburn Sew-Along, but realistically I'm just slack!). Anyway, better late than never, right? Today I wanted to share another wallet, this one a Christmas gift for my Gran.


After seeing the one I made for myself, my Gran expressed an interest in having one herself. So we went through her fabrics for her to choose what she'd like her wallet to look like.


We found this lovely shell fabric, which is an African fabric with a sort of waxy finish on it. As Christmas approached, I selected some coordinating fabric for the lining and set about making the wallet.


This time I interfaced a lot more of the pieces, as my first wallet turned out to be a bit 'floppy'.


Second time around it was a lot easier than the first, and I'm very happy with how it turned out; look at that super top-stitching! (I know, I'm so modest!)


Now to make myself a new one too...

Sunday, April 1, 2012

New Wallet!

I'm back! I'm all moved and settled in and starting to get back into a rhythm, and so I have something to share again... a new wallet!

Our finished wallets!

This past Friday at the MMQG Sit and Sew Evening Bek agreed to teach me and Jocelyn how to make wallets. You see, she had made a beautiful one before but was talking about replacing it, and very kindly agreed to save making one for a sit and sew so we could join in too. It turns out the tutorial that she followed is very well written and we didn't really need teaching, but it was nice to have the moral support!


Now due to how much we all natter on at the sit and sews we didn't quite get them finished on Friday night, so the girls popped over to my flat this evening to finish them off. We all squeezed around the tiny little table I currently have (see above)(which was ok since wallets are small) and finished them off pretty quickly.

The inside of Jocelyn's wallet

The inside of my wallet

The inside of Bek's Wallet

We couldn't find the tool kit to use a hammer to put in the snaps, but it's ok, we improvised!


The girls both used some spotty Oil cloth that Bek had for the outside of their wallets, but I tried something different. I used some regular quilting cotton (some Japanese stuff my Gran had given me) and some iron on Vinyl that I bought at GJs. It is a bit like sticky back plastic for fabric and seems to be pretty good. It ironed on really well, I had no issues at all with any bubbles or puckers or anything. I'm not 100% sure how hard wearing it'll turn out to be, time will tell on that.

Left to right: Jocelyn's, Mine, Bek's

One thing that came up when we were sewing that I thought I'd share was something to do with the 1/4" foot that comes with many machines. Below is pictured my 1/4" foot. (Now ignore the black guide along the right hand side of the foot, I know that some people detest it and rip it off) The part of the foot I want to talk about is the left hand side.


Do you see the three little lines along the left hand side of the foot? The middle one is level with your needle, and the other two are 1/4" in front of and behind the needle. This is really handy if you need to stop your stitching line 1/4" before or after a point, for example 1/4" before the edge of the fabric when you're about to turn a corner.

The girls hadn't registered those lines on their feet, so I thought I'd share about it on here too incase anyone else hadn't seen it. My foot is for a Janome, does anybody know if there are similar markings on feet for other machines? Had you spotted those lines on your foot? Are there any similar tips for other feet that you know of?
Related Posts Plugin for WordPress, Blogger...