Showing posts with label Muslin. Show all posts

Sunday, January 25, 2015

Ziggi - A day's worth of muslins...

So I spent today making muslins for my planned Ziggi jacket. Yes, muslins plural, and I'm not done yet. I kinda think I would have been better off just drafting myself my own jacket, I wouldn't have been much worse off given what you actually get when you buy the Ziggi pattern, it's not like the instructions are anything worth paying for.


First up, let's recap... I have some gorgeous aubergine wool suiting that I want to make into a biker style jacket, and from limited selection of options, I settled on the Style Arc Ziggi pattern.

Now, the style arc patterns are single sized, so you can print only one size at a time.


My bust and waist come in between the 10 and 12, and hips between 12 and 14. For this reason I chose the size 12. Interestingly, my "upper arm girth" places me in the size 8, but my "shoulder breadth" just above a size 14. When you buy the pdf pattern you get three sizes, so I bought the size 10-12-14 bundle of patterns.


Above is the muslin of the size 12, straight out of the envelope.

Starting with the good; I really like how the collar is sitting. And despite the size chart suggesting that the sleeves would be too big I like the width of the sleeves.

And onto the bad issues...

The pooling at the back is somewhat expected based on my body shape, and I didn't worry about that straight away, working on the principle of starting at the top and working down with fitting... the most obvious issue was the armholes. The armholes came very far down, impeding my arm movement an awful lot.


It bunched up as shown above when I moved my arms around at all. My first thought was raising the armscye, but I noted that the bust felt a little more comfortable when the jacket was bunched up around my shoulders like that, so I tried removing some vertical length from between my armpits and shoulders...


Pinning out the excess did seem to help, and achieved the goal of having free use of my arms (a somewhat important thing don't you think?)


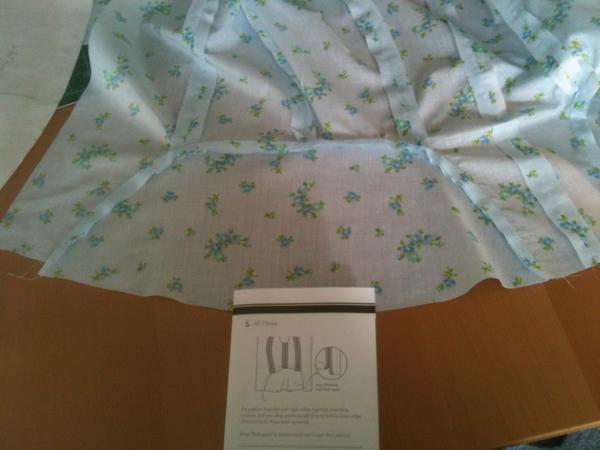
I did some partial unpicking and slashed and overlapped all the pieces and stitched them down to check out this alteration a bit more (see above pics), and thought it was promising enough to transfer to my pattern pieces. As this alteration had reduced the overall length of the jacket, I added the length back in at the waist to make the jacket the length I wanted it.

And so my second muslin...


While the principle of my alterations were good, there are obviously still quite a few problems...

Two changes I could easily make to this muslin were that I had added the length too high in the back, and now the seamline of the back peplum piece is sitting too low, so I shortened the upper back pieces and lengthened the peplum to move this seamline up. I also added half an inch of width to the bottom of the peplum while I was redrafting it, to give the jacket a little more ease over my behind....


(Yes, that's my "I've spent a whole day on this muslin and it still looks terrible" face).

So, at the end of a day of muslining I still have a heap of problems, for which I'm thinking the following changes for muslin number three:

- Add a little more length back in where I removed it between the armpits and shoulders to hopefully alleviate some of the pull lines from the armpits
- Take the width of the shoulders in by about 1.5 at the top, tapering to nothing by the lower sleeve piece (note my comment earlier about being worried about making a size too small for my "shoulder breadth" - what a load of tosh that measurement is! It's too big in the shoulders, not too small!)
- Do a sway back adjustment to remove some of the pooling at the small of my back
- Do a small FBA through the middle of my "middle front piece", to add some more ease and shaping through the bust
- Possibly add a little waist shaping through the side seams.

What do you think? Would you make those changes based on the above photos? If not, what changes would you make?

...and if I do eventually manage to get a good fit, I then need to work out how to make equivalent changes to the lining pieces.

Which reminds me of another frustration with this pattern; the pattern notes that the lining is optional, however you have to print all the pieces, there's no option for printing just the shell and/or lining pieces. This is frustrating me right now in particular as I'd quite like to reprint just my outer pieces, but to do so I'll have to reprint the whole thing. The lining and shell pieces are completely mixed together on the pattern sheets, so it's not even like I could just print some of the sheets to print the shell pieces again. I'm very disappointed by this.

Thursday, December 27, 2012

Cordova Muslin

I popped round to see Sarah last Sunday and accidentally came home with a copy of the Sewaholic Cordova Jacket Pattern. I've been thinking about making one to wear at work for a while, so decided to bite the bullet and at least make a muslin to see the shape of the jacket on me, without the extra peplum.

So this afternoon I traced off the pattern (in a size 10) and stitched up a muslin. I really like the pattern so far, but I think it needs a few tweaks to perfect it for me. However, I really need some opinions/advice as to what you guys think I should do. (Apologies for the harsh light and slightly fuzzy pictures - I'm still trying to get the hang of self-portraits!)


Looking both in the mirror and at the photos, most of the fit issues are in the back of the jacket. However, I do think I need to narrow the shoulders slightly, the seam sits at the end of my shoulders rather than at the end of the bone, so the top of the sleeve is completely empty! If I want to do that do I just take it off the armhole?

There's also a tiny bit of pulling under the bust, but i'm not sure if it's enough to worry about or not? (I'm questioning it as I have no idea how I'd do a comparable alteration to the lining as it has different seamlines!)


It's the back where it's a mess - my lovely protruding behind and sway back pushes the jacket up and causes lots of wrinkles. Above you can see how it sits with just a minor amount of movement before the photo, and below left I deliberately lifted my arms above my head and didn't pull it down again at the back after at all.

I can't decide if i need to do a sway back adjustment, add some extra width around the hips (somewhere?) or shorten above the peplum. The seam of the peplum falls slightly below where I really start to widen out, but I don't know where it would be most flattering to fall. I think if i shortened above the peplum I'd get rid of a fair bit of the creasing and blousing in the back because it would have more ease to drop back down where it's supposed to be sitting, rather than getting stuck above my hips. Adding some more ease in somewhere below the hip could also possibly help with that? What do you think? What would you do?

(Obviously once I've fixed the back wrinkles I'll have to assess the length so it doesn't swing up in the back like it is at the moment)

I've also spotted diagonal lines running from my shoulder-blades to my armpits on the back - would I fix that by adding a smidge to the back side seam? (more obvious in the above photos than below ones)


Also, how long are sleeves supposed to be?

And lastly, not a fitting issue but a problem I had - when sewing it together the back pieces are supposed to be longer than the peplum but mine weren't - they were the same, and then the peplum was longer than the front piece. I double and triple checked, that was the only way around the peplum would go in, as the double notches went at the back/side-back seam where there was an extra notch... Help?!


In conclusion - I desperately need a good book on fitting, so in addition to any fitting advice, any fitting book recommendations gratefully received.

Saturday, January 28, 2012

Beignet Muslin, and Super Oops!

Thusday this week was Australia Day, which means a day off work, hurrah! After a lovely picnic in the park with some friends, me and Claire went back to her house to work on our Beignet muslins. She had already traced her pattern pieces and made a muslin, but I hadn't started at all.

I decided to have a go at grading between sizes on the pattern, because my waist and hip measurements fell across two different sizes. So when tracing the pieces I traced a 12 for most of the skirt, but a 10 at the waist, and joined up between the two over the three inches above the "lengthen/shorten" line marked on the pattern.

I then cut out just the pattern shell pieces from some poplin to make a muslin, stitched up the seams and pinned where the buttons should be, and horror of horrors, it was WAAAAAY too big, as shown on the left below *insert sad face here*


After having a bit of a look at the muslin, I decided that I could pinch out the extra full-ness in the centre back, so did a quick seam up the centre back taking out a whopping 6cm(!!). Lots of cursing about stupid sizing was performed, but after that alteration the skirt fit pretty much perfectly (see above, right). My grading has left a slight bump on the front between the centre front and side front pieces, which I will smooth out, but other than that the skirt fits great.

However, before you start thinking that Sarai doesn't know what she's talking about please keep reading....

Look at what I noticed on my centre back pattern piece when I was folding it up to put it away:


Yup, that's right, I hadn't cut out the pattern piece along the "cut on fold" edge. I had just left it thinking "oh I don't need to cut there, I can just line up the line with the fold when I cut it out" but then had proceeded to completely forget that part and lined up the fold with the edge of the paper. And guess what, that extra bit of paper is pretty much exactly 3cm (ie 6cm extra fabric!)

Oops! Sorry Sarai for cursing at your pattern drafting, there is nothing wrong with it at all, it fits perfectly, it was 100% operator error!

So the morals of this story?

1) Don't be lazy when you're cutting out your pattern pieces
2) Pay attention when you're placing pattern pieces and cutting them out
3) The Beignet so far seems to have a fantastic fit, and the envelope measurements are pretty much spot on.

Wednesday, May 18, 2011

One Pattern, Seven Bloggers - Fit


Wow, week three of the "one pattern seven bloggers" project already, time is flying! Did you check out the great fabric and fitting posts from the girls last week? They're all linked at the bottom of last weeks post. This week I will discuss how I tackled fitting the pattern.

I have a confession to make, I kinda cheated when it came to altering the "one pattern seven bloggers" pattern to fit me. You see, the pattern really is quite similar to the bodice that I drafted over Christmas with a three key differences; both the front and back necklines, the cap "sleeves" on the Burdastyle bodice, and my bodice has two bust darts whereas the Burdastyle one has just one.

Burdastyle pattern on the left, my bodice pattern on the right

Rather than going through the whole fitting process again I used the pattern pieces of my bodice to trace off some of the seamlines to hopefully get a good fit straight away. I also decided to keep the two bust darts rather than convert it into one dart as I was sceptical as to the quality of the fit over my boobs if I just did one dart.


I started with the back bodice piece as I expected it would need less changes, and I could straight away see that the Burdastyle bodice is much too long for me (which isn't surprising, I had to shorten the length of the Emily Blouse when I made it too). I lined up the pattern pieces using the underarm seam and the top of the darts as reference points and I could see that I needed to remove length from both ends, so I drew the waist seam line according to my bodice pattern, and then picked the shoulder seam from the Burdastyle pattern that looked at the right height.. I then drew in the centre back seam from my bodice pattern, but extended it up to the neckline of the Burdastyle pattern and this is what I ended up with:

My back bodice piece ready to make into a muslin

Then I moved onto the front bodice piece, which needed more changes, mostly due to adding the second dart. I lined up the pattern pieces the same way, using the corner of the underarm seam, and traced off most of the shape of the pattern piece of my bodice (the darts, side seam and waist seam). It's a very different shape due to the added dart.

The shoulder seams were MUCH higher than the length of my bodice (sorry, I forgot to take a photo), so after checking that it was identical to the front shoulder seam, I used the shape of the back shoulder seam that I'd just finished to draw a lower front shoulder seam, basing the height on the height of my bodice pattern piece. I then used the neckline as per the Burdastyle pattern.


I was inspired to try it this way from the method that Carolyn has mentioned that she uses to modify patterns, where she uses her TNT pattern to get the fit and the shape right, and uses new patterns to add design features easily to the pattern that she knows already fits her.

Thankfully these changes meant that when I made up a muslin the fit was already pretty good. I made three small changes to the pattern after my muslin (which I didn't manage to get a photo of because there wasn't anyone around to take one for me, sorry!)

I lengthened the bodice by 2.5 cm - I was concerned in my muslin that it was sitting a little high, so I have lengthened the bodice and will make a final call when i've sewn the bodice together but before I attach the skirt.


I actually wore the muslin around the house for a bit (I was home alone), and in doing things while wearing the muslin I discovered a major fit problem - the bottoms of the armholes were too high, particularly at the front. While hanging out some washing I felt a rip, and the front armhole had ripped perpendicular to the seam! So I trimmed off some of the armhole so that (hopefully) doesn't happen in the real dress.

What was trimmed off the armholes

Lastly, the front neckline was gaping a bit so I took two tucks in the neckline pointing towards the bust point, which I then rotated out of the pattern piece on the paper:

First I cut out the tucks down to the bust point:


Then I rotated the pattern piece to close the space from the tucks. I also trimmed the neckline to give it a smooth line:


And so my pattern is ready to go!! Exciting.

Remember to check out the posts by the other lovely ladies involved in this project: (once again, links to the posts will be added once they're posted)
Sam: http://hand-quilter.blogspot.com/2011/05/one-pattern-seven-bloggers-3.html
Marie: http://asewingodyssey.blogspot.com/2011/05/one-pattern-seven-bloggers-3-fabric.html
Reana Louise: http://curvespatternsandpins.blogspot.com/2011/05/my-dog-ate-it-miss.html
Kat: http://petticoatsandpeplums.blogspot.com/2011/05/1-pattern-seven-bloggers-week-3.html
Jen: http://the-paperdoll.blogspot.com/2011/05/one-pattern-seven-bloggers-3.html
Amy: 
http://sewingthroughthemotions.blogspot.com/2011/05/one-pattern-seven-bloggers-fabric.html

Sunday, September 13, 2009

Muslin Draft 1...

I finished stitching my esprit dress muslin together today. The first thing I learnt - sewing curves is tricky! Secondly, I need to make some alterations to the pattern before making the real thing. However, for a first try both at this dress in particular and pattern altering in general I don't think it's too bad.


The Front: there is some baggy-ness around the front of the armholes, and it's a bit tight around the hips, so I need to let that out slightly so it doesn't pull across so much.
The Back: You can't quite see it here but it gapes quite a bit at the top of the centre back, and as you can see it has gathered up quite a lot by my lower back, so I need to fix that too.
To help me with these alterations I got a book from the library to help me with called "Fast Fit: Easy Pattern Alterations for Every Figure". I'm not sure what it's like or if it's even any good, but it was the only one they had on fitting patterns, so I figured I'd give it a go.

I got a few other books while I was at the library, mostly sewing ones, but also one called "A Guide to Elegance" that caught my eye on she shelf above the sewing books, which has some very entertaining passages in it. Here's one that caught my eye earlier on the topic of shopping:
"Shopping provides that same joys in the city that hunting does in the country - in both cases the huntress is rewarded by bagging the object or animal of her dreams!"
Related Posts Plugin for WordPress, Blogger...