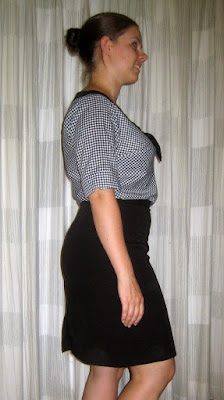
If anybody knows why facings are supposed to be so amazing, please do tell me, because I'm curious why patterns are such advocates for them, there must be a reason, I just don't know it yet.
Anyway, I thought I would put together a little tutorial of how I added the biased binding to the neckline on the jasmine blouse.
To prepare I made some 1" bias binding, pressing it with my little bias binding presser gadget so the edges were pressed into the centre. I used the scraps left from cutting the blouse pieces on the bias to cut the strips.
I followed the instructions in the pattern up until the "create facing" steps. This left me with the front and back of the blouse sewn together, with the collar basted onto the neckline:
The collar is basted flat onto the raw edge of the neckline:
Then I pinned the bias binding around the edge of the neckline. I lined up one of the folds in the bias strip with the basting seamline
Because the seam allowance at the neckline is 5/8", and the edge of the bias binding is 1/4", you will have about 3/8" of the collar and neckline seam allowance hanging outside of the edge of the bias binding:
Now you need to sew the bias binding onto the neckline. You need to stitch along the fold in the bias binding (so 1/4" from the edge of the binding):
After you've stitched it it should look something like this:
On the inside you should see that your stitching line is hopefully right on top of your basting line (the two black lines in the below picture, the white line is my stay stitching):
Now you need to trim your seam allowance. I trimmed mine to about 1/4" inch, which was nice and easy as I cut approximately along the edge of the bias strip:
Now you need to fold the bias binding back around to the inside of the blouse and pin it down:
When you do this it's important that the collar is sticking out, and that you only pin through the bias binding, and blouse layers, and that the collar is left free.
This step was a bit tricky to get a photo of, but hopefully in the below photo you can see the blouse and bias binding folded together on the left, and the collar out on its own on the right. The seam allowance you just trimmed is enclosed between the bias binding and the blouse.
You then need to stitch along the edge of the bias binding to hold it down - as you can see above, i'm stitching about 1/8" away from the left edge of the bias binding (the right edge was the side I just stitched)
Once you've gone all the way around the inside of the neckline of your blouse will look like this:
And on the outside underneath the collar you'll have a nice neat row of stitching where you stitched down the bias binding:
Which is completely hidden by the collar:
Even at the front:
You can now resume with the pattern instructions from the "attach sleeve cuff" steps, having skipped the "create facing" and "attach facing" steps.
I hope that you find this tutorial clear and useful. If you have any questions please ask them in the comments.


